
 Setup Development Environment
Version: 1.2 | Release Date: 07/02/2024
# Caution
If you lack a basic understanding of the aiM18 platform, be sure to read the following information first:
# Requirements
- Please make sure you have installed the
User acceptance testing (UAT)program . You can think ofUATprogram as another completely independent aiM18 platform for user testing, and our development environment relies on it. - You may need to contact Multiable staff to install the
User acceptance testing (UAT)program. - Copy
UATWildFly to your development PC. - Since your machine is going to run
UAT WildFly, we recommend that you have at least 4G of memory. - JDK version 1.8 or higher
- In this document, the app name is assumed to be
opcq.
# Configuration Guide
# 1. Install JRE
Make sure JRE installed with version 1.8 or higher
# 2. Add Server Runtime
- Runtime =
WildFly Application Server 9.x - Home Directory = The WildFly you copied from
User acceptance testing (UAT)|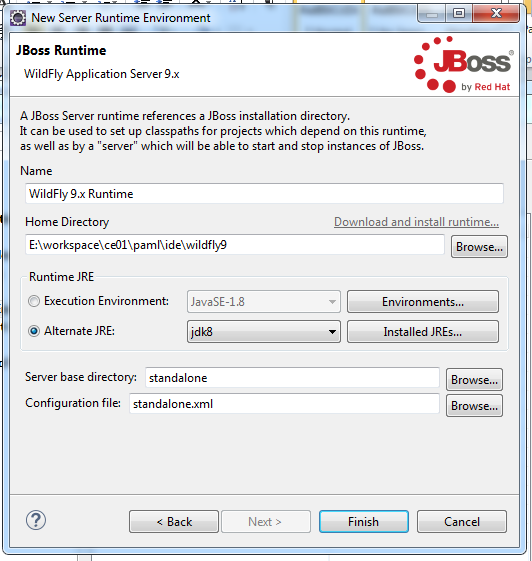
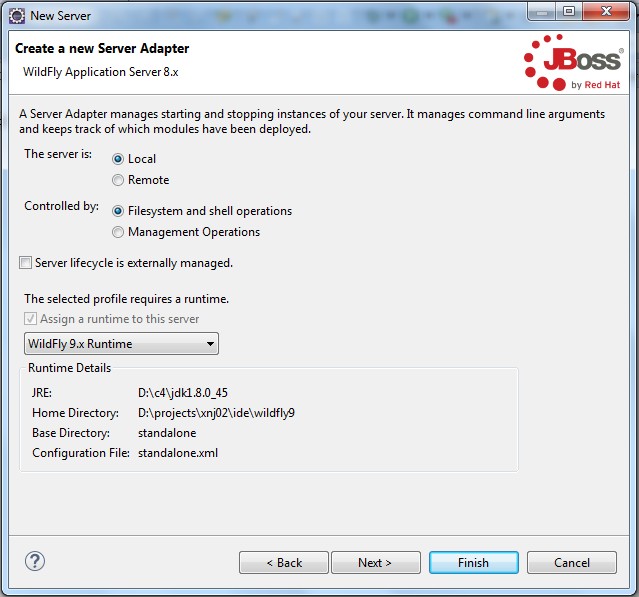
- Create a server Adapter use this runtime
|
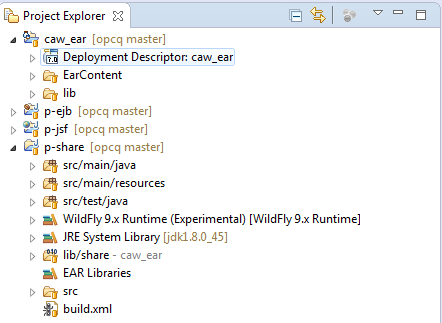
# 3. Create App Structure
git cloneApp Skeleton from Github aiM18 (opens new window)git clone https://github.com/m18ce01/M18-App-Skeleton.git opcqopcqfolder structure should looks like

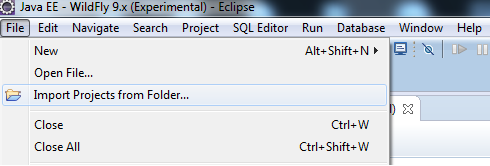
# 4. Import Projects from Folder
Use [File -> Import Projects from Folder] of Eclipse to import p-ear p-ejb p-jsf p-share one by one
# 5. Configuring App Properties
the default App name is
paml, we need to rename it asopcqchange
paml_ejb.jar=>opcq_ejb.jarchange
paml_share.jar=>opcq_share.jar
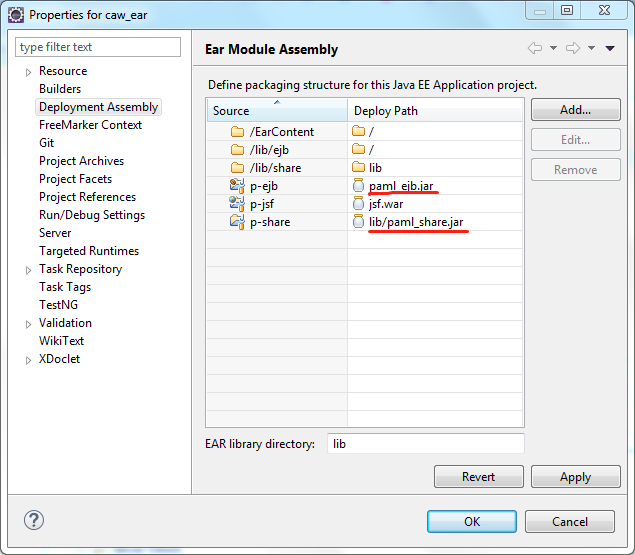
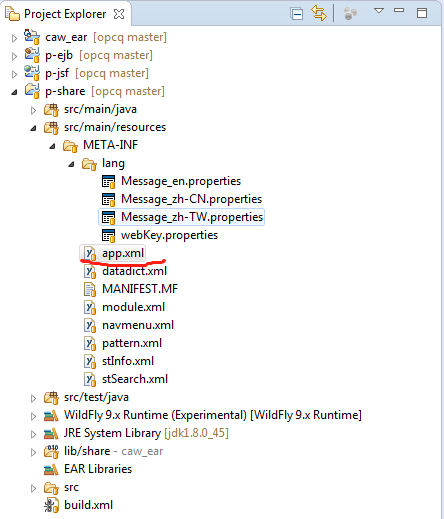
- update app.xml , you can refer to Overview - app.xml for detail.
# 6. Copy compile environment
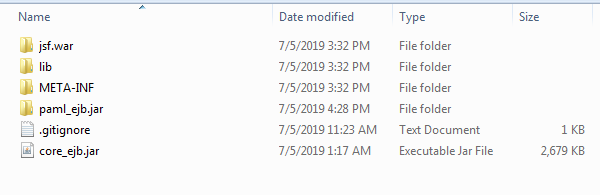
Your WildFly Home\standalone\deployments\caw_ear.ear directory should have more Jars than the one shown above (depending on how many apps you have installed)
*_ejb.jar means all Jars whose names end in _ejb.jar
copy
WildFly Home\standalone\deployments\caw_ear.ear\*_ejb.jartocaw_ear\lib\ejbcopy
WildFly Home\standalone\deployments\caw_ear.ear\lib\*_share.jartocaw_ear\lib\sharecopy
WildFly Home\standalone\deployments\caw_ear.ear\jsf.war\WEB-INF\lib\*_jsf.jartocaw_ear\lib\jsf
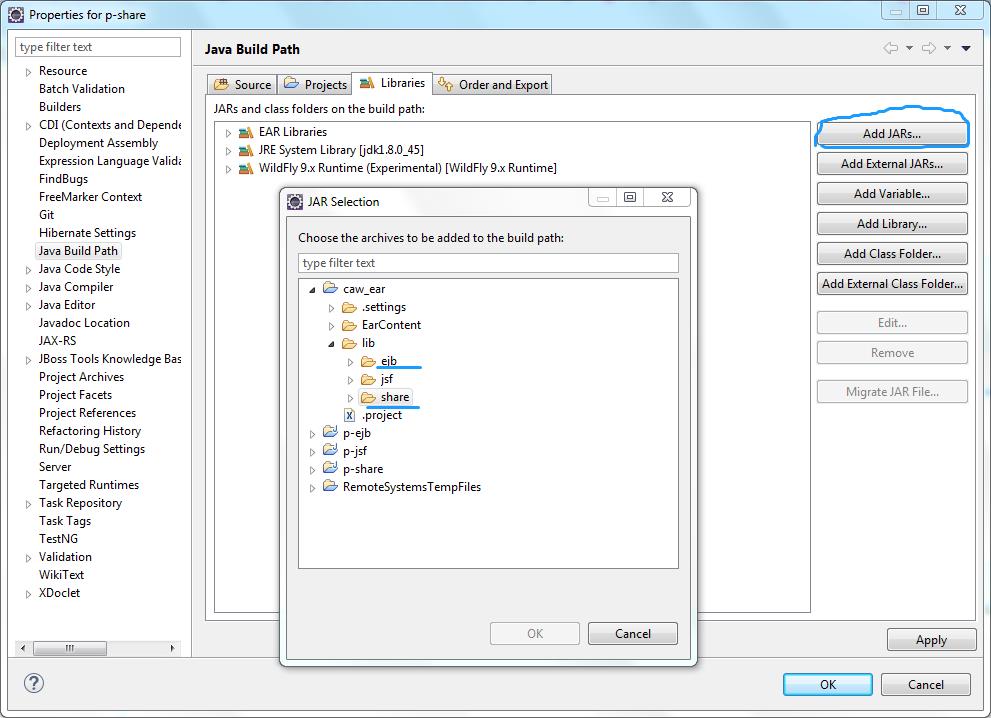
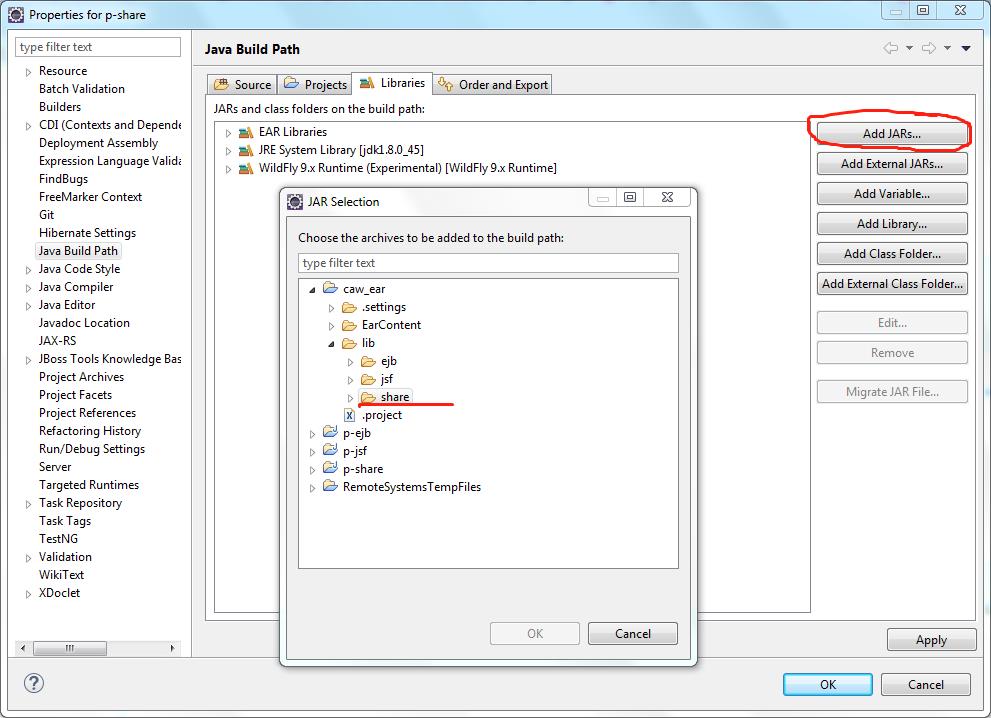
# 7. Config p-ejb build path
add all jars which under caw_ear\lib\ejb and caw_ear\lib\share to Libraries
# 8. Config p-jsf build path
add all jars which under caw_ear\lib\jsf and caw_ear\lib\share to Libraries
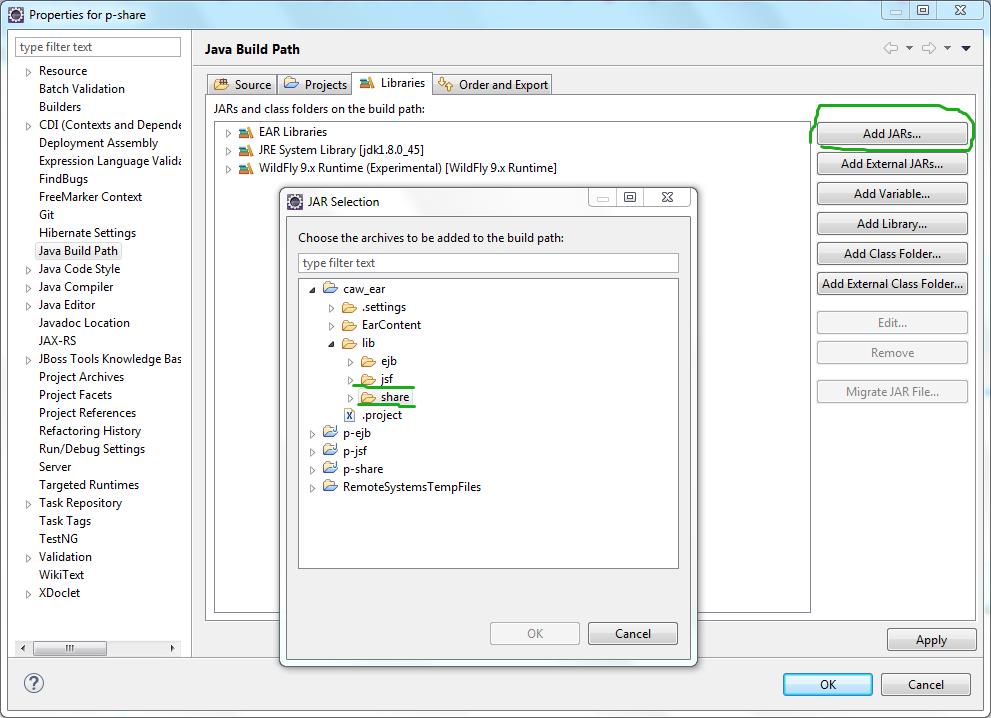
# 9. Config p-share build path
add all jars which under caw_ear\lib\share to Libraries
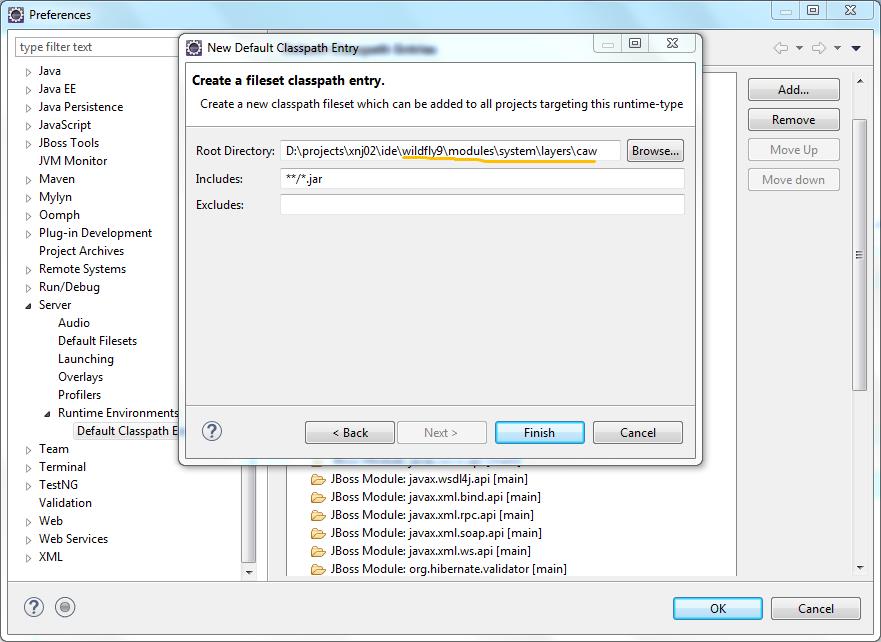
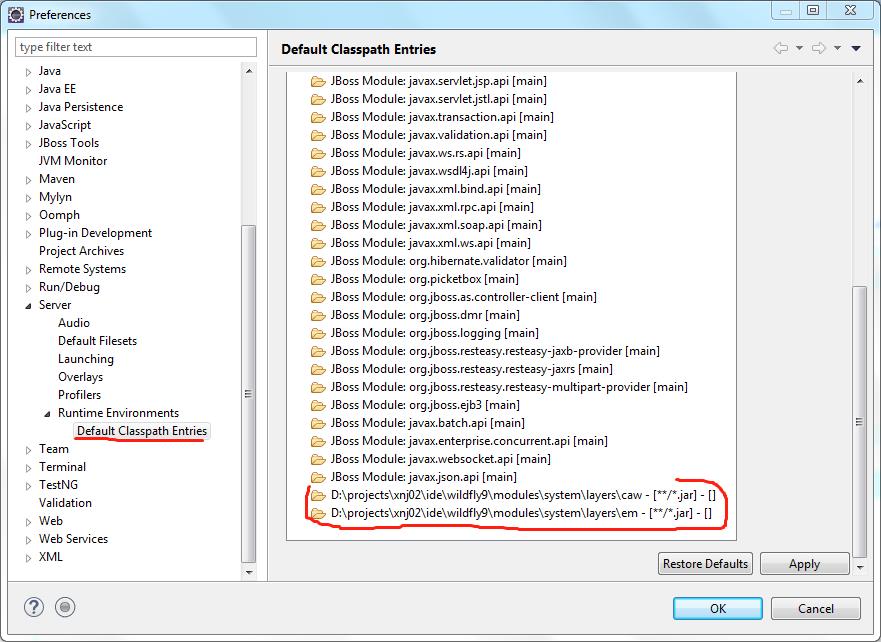
# 10. Extend WildFly 9.x Runtime Classpath Entries
The aiM18 platform introduces several Jar packages through the WildFly Module. Adding these Jar packages will greatly facilitate your development process.
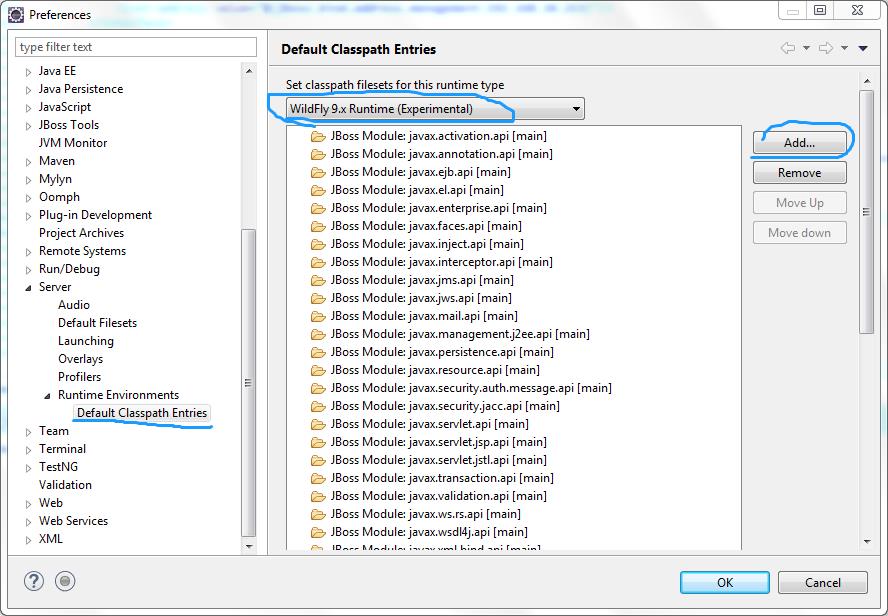
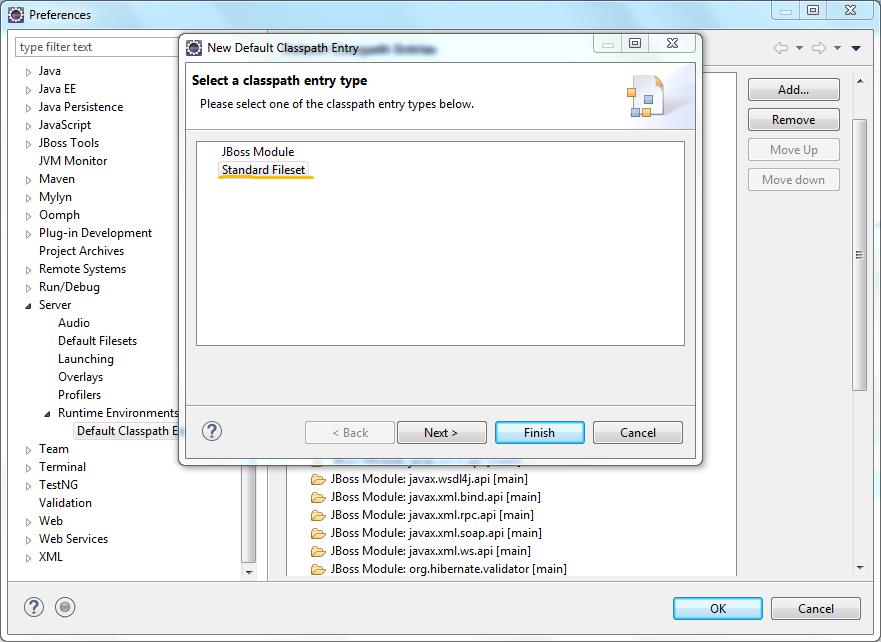
Add these three to classpath entry
WildFly Home\modules\system\layes\caw
WildFly Home\modules\system\layes\em
WildFly Home\modules\system\layes\base
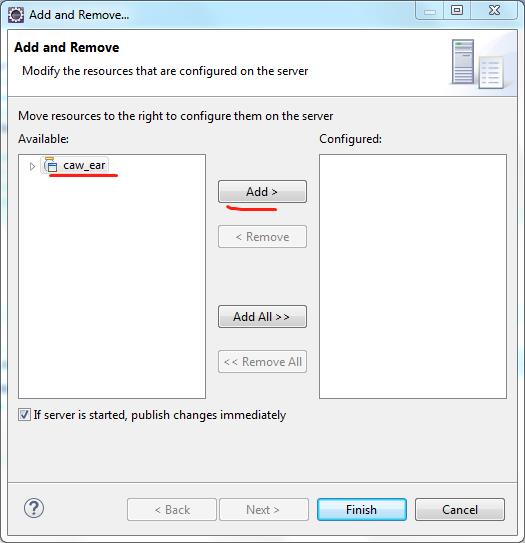
# 11. Run the program
add caw_ear project to Eclipse Server and start
# 12. Build the App by Ant
modify \opcq\p-other\ant\build_output.xml, change appname => opcq
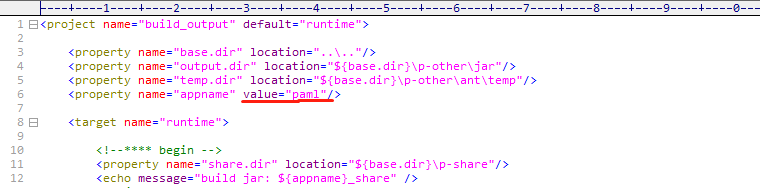
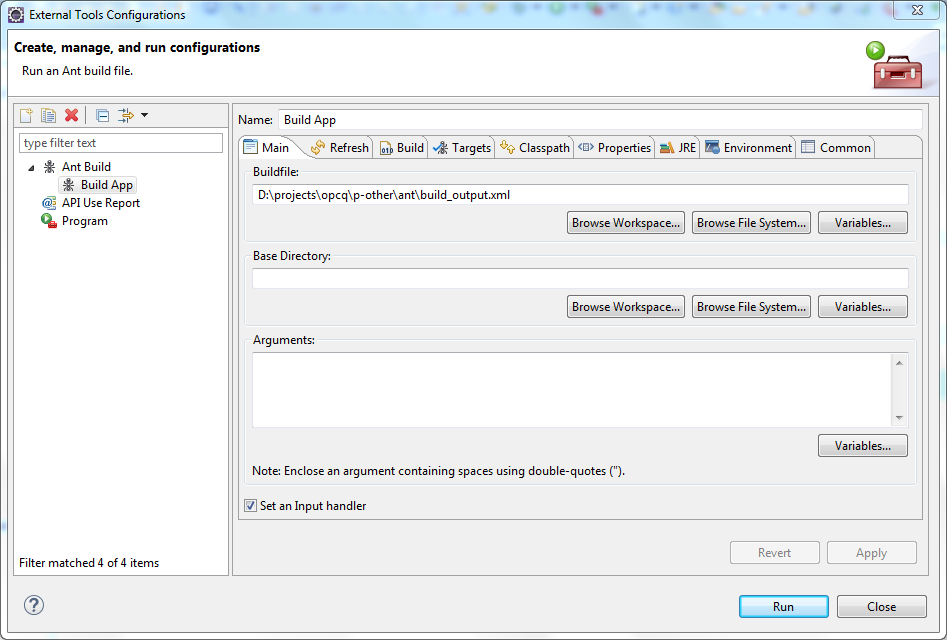
You should get jars under \opcq\p-other\jar like this
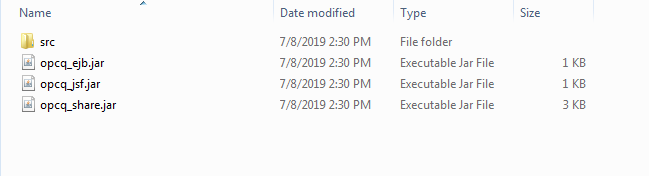
# 13. Deploy the App
copy
opcq_ejb.jartoWildFly Home\standalone\deployments\caw_ear.ear\copy
opcq_share.jartoWildFly Home\standalone\deployments\caw_ear.ear\lib\copy
opcq_jsf.jartoWildFly Home\standalone\deployments\caw_ear.ear\jsf.war\WEB-INF\lib\
You can also build the app into a specific format and install it via USU.